| Table of Contents |
|---|
| Youtube | ||||||||
|---|---|---|---|---|---|---|---|---|
|
Checklist
| Ensure all required libraries and software is installed as per install from source guide | |
| Ensure all required path variables are setup as per install from source guide |
Checkout the project
Navigate to directory of your choice where you want the sources to reside on your file system.
For this guide we will be using:
| Code Block |
|---|
/development/projects/java |
Create a new directory for YC project.
For this guide we will be using:
| Code Block |
|---|
yc-idea |
The repository is located at GutHub https://github.com/inspire-software/yes-cart.
Please refer to instruction on GutHub https://help.github.com/articles/which-remote-url-should-i-use/ on the cloning/forking options available.
| Tip |
|---|
| Cloning is the typical way of getting repository for YC developers. For changes to be pushed to repository you need write permissions. If you plan create your own version of YC the platform you should consider forking repository instead (see GitHub guide https://help.github.com/articles/fork-a-repo/ ). |
The easiest way to clone YC is to use GitHub application but you will need a GitHub account for that.
Alternatively you can use command line but you will need to setup git (see guide https://help.github.com/articles/set-up-git/ ). And then run:
| Code Block |
|---|
$ mkdir yc-idea $ cd yc-idea $ git clone git@github.com:inspire-software/yes-cart.git . |
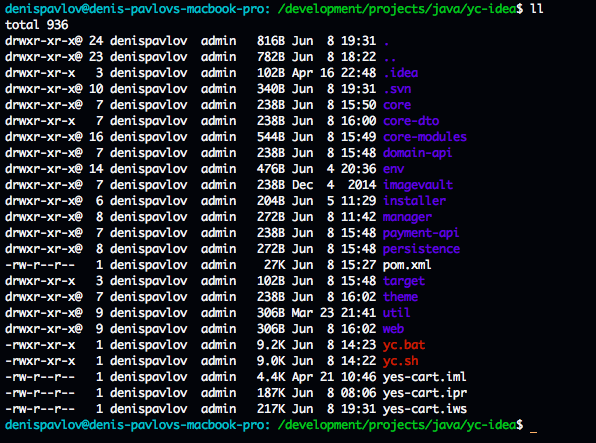
This will put all sources to the yc-idea directory which will look something like this:
Setting up the environment
| Tip |
|---|
| On *nix systems you need to add executable permission to ./yc.sh script like so: "chmod +x yc.sh" |
Use the yc.sh or yc.bat file in order to setup the environment.
| Info |
|---|
| This script uses mvn executable therefore if you have abnormal maven installation please open the script and ensure that MVN variable points to the correct executable. |
Add manual dependencies to maven
Use the script command to add 3rd party dependencies that are not available through maven central:
| Code Block |
|---|
$ ./yc.sh i3rd |
Run the maven install
Use standard maven install command from the root of YCproject directory to ensure that all modules are built.
| Code Block |
|---|
$ mvn clean install -PdevIntellijIDEA,derby,ftEmbededLucene,paymentAll -DskipTests=true |
| Warning |
|---|
| If you are planning to use IDEA setup as your primary development option you must always use devIntellijIDEA when building from command line |
| Tip |
|---|
| For this setup we are using the devIntellijIDEA profile for a derby build. Please consult this page for details on the available profiles |
The build process will take some time. Note that we are using clean install as clean phase will ensure that all node_modules dependencies for jam-jaclient are correctly installed. skipTests option will allow us to save some time by skipping the tests during this build
Setup derby database
| Tip |
|---|
| If you encounter java.security.AccessControlException: access denied ("java.net.SocketPermission" "localhost:1527" "listen,resolve") refer to Derby quick startguide. |
Start the derby in background
| Code Block |
|---|
$ ./yc.sh derbygob |
Ensure that you see the following message that signifies that Derby has started and ready:
| Code Block |
|---|
================================================ Starting Derby database (background mode) ================================================ Derby server started on port 1527... Mon Dec 31 14:38:06 GMT 2012 : Security manager installed using the Basic server security policy. Mon Dec 31 14:38:11 GMT 2012 : Apache Derby Network Server - 10.8.1.2 - (1095077) started and ready to accept connections on port 1527 |
Run the dbi (database initialisation)
| Code Block |
|---|
$ ./yc.sh dbiderby |
This will generate the following message:
| Code Block |
|---|
================================================ Initialise Derby database ================================================ Setting Derby environment variables Running init script /development/projects/java/yc-idea/env/setup/dbi/derby/dbinit.sql Initialisation complete. See log: /development/projects/java/yc-idea/derbyinit.log |
Ensure that derbyinit.log file does not have any critical errors in it (e.g. Table not created or insert failed).
At this point you have a blank YC Derby database.
| Tip |
|---|
| We recommend backing up the database files so that a clean version is always available. |
| Warning |
|---|
| When working with Derby files ALWAYS shutdown the Derby server prior doing the backup - or the database will become corrupt. |
Shutdown derby
| Code Block |
|---|
$ ./yc.sh derbyend |
Ensure that you see that shutdown message:
| Code Block |
|---|
================================================ Stopping Derby database ================================================ Mon Dec 31 14:45:28 GMT 2012 : Apache Derby Network Server - 10.8.1.2 - (1095077) shutdown Derby server stopped... Mon Dec 31 14:45:29 GMT 2012 : Apache Derby Network Server - 10.8.1.2 - (1095077) shutdown |
Optionally backup the files
The Derby files will be located in
| Code Block |
|---|
/env/derby/lib/yes - the main database /env/derby/lib/yespay - payment transactions database |
In order to back up just copy these two directories. When you need to reinitialise the database just replace these with backed up versions. ALWAYS do this with Derby shutdown otherwise the database files will become corrupt.
Setup the project
Initial project setup
| Tip |
|---|
| Intellij IDEA comes bundled with Maven 3, we highly recommend not to use it and reconfigure Maven home to point to your local installation that you use to perform command line builds (Preferences > Build, Execution, Deployment > Build Tools > Maven) |
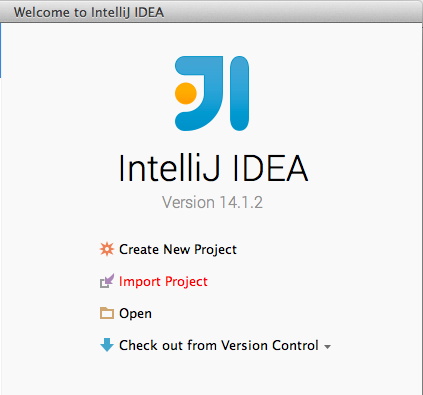
Open IDEA and select Import Project
Point to the pom.xml in your project root directory
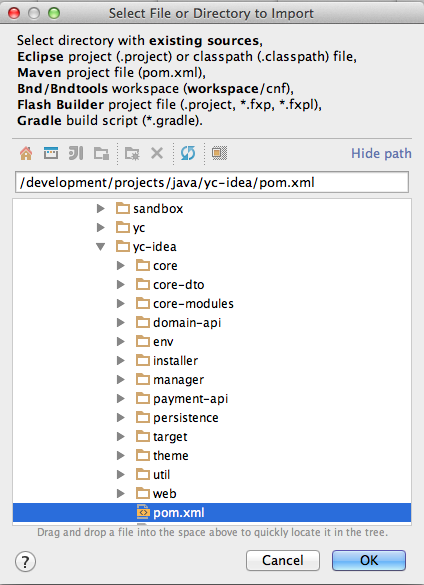
Leave the directory path as is and click next

Select then following profiles: derby, devIntellijIDEA, ftEmbededLucene and paymentAll. Make sure that other profiles are unticked.
| Warning |
|---|
| Ensure that you select ALL relevant profiles for the version you are using, as new versions may introduce new mandatory profiles that must be selected |

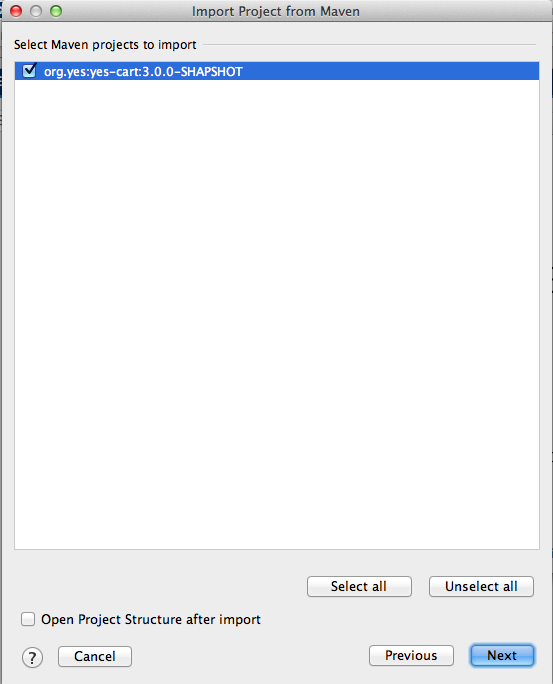
Select the maven project to import:
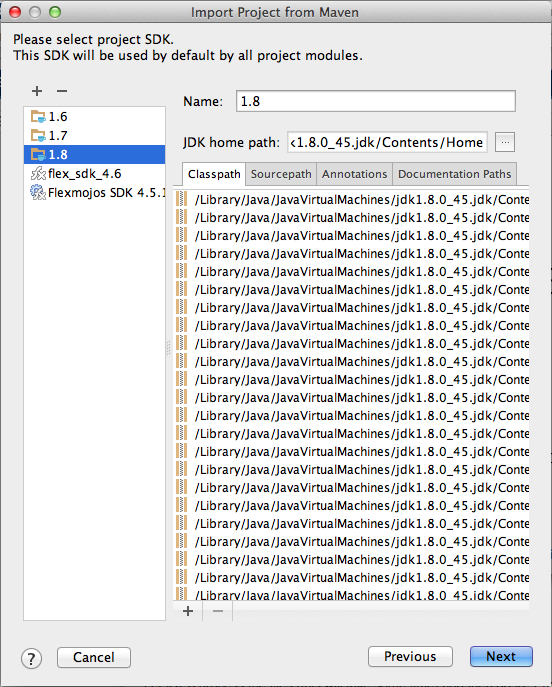
Select project SDK:
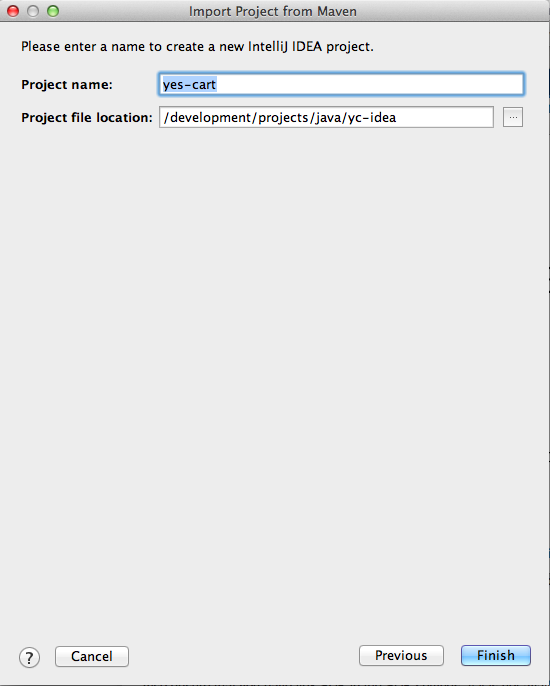
Leave the project name as is and finish:
Let IDEA process the files (this will take some time).
Run/Debug configurations
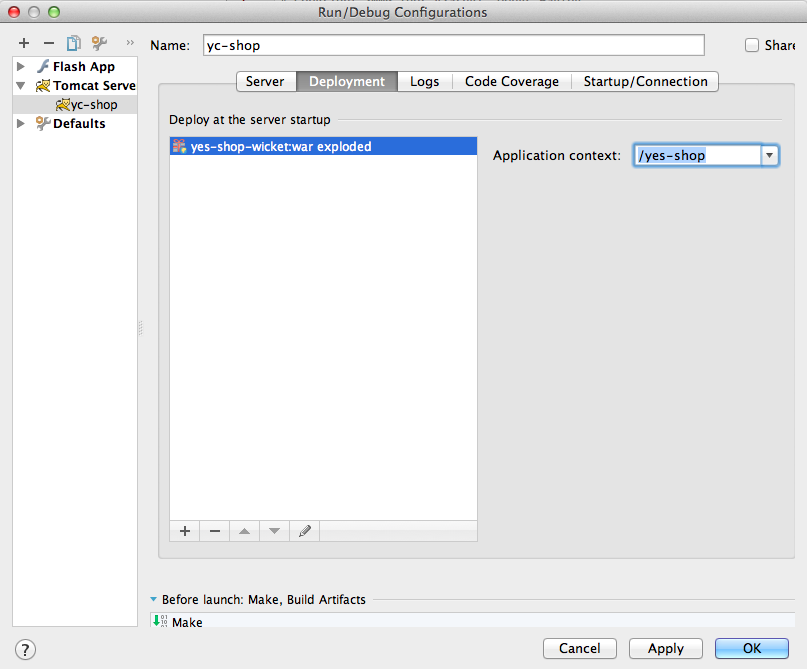
Webapp Yes Shop
Open configurations window: Run > Edit Configurations
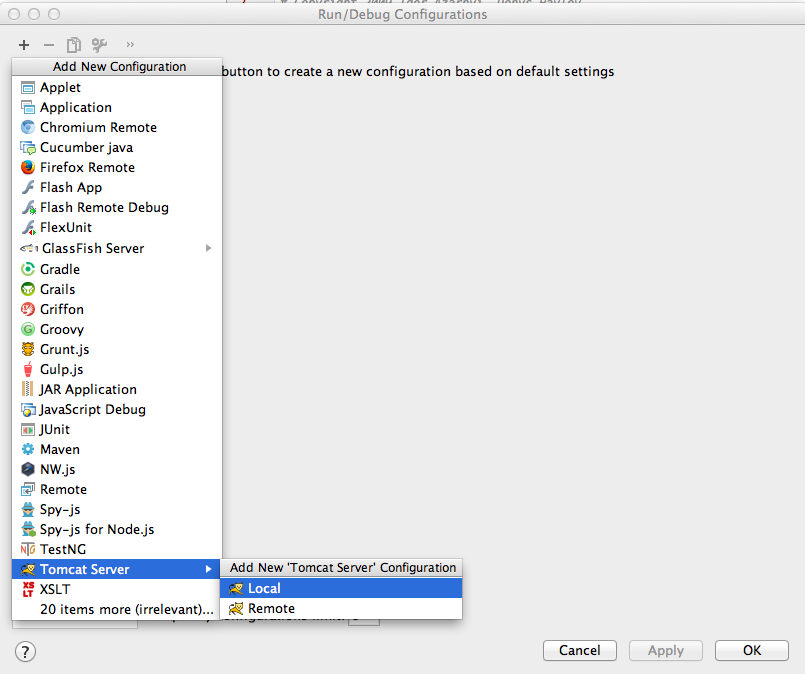
Click "+" in the top left corner and select "Tomcat Server > Local" from the menu
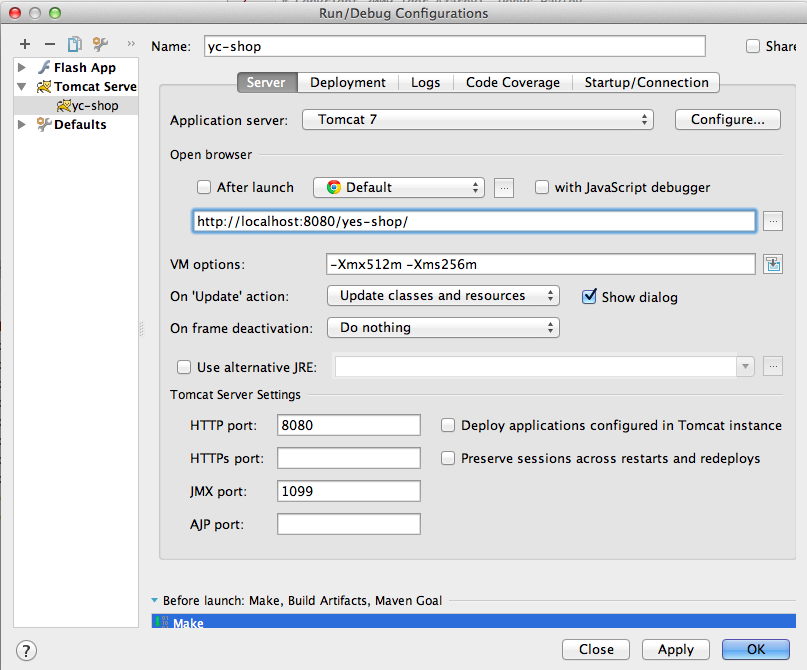
In the window specify:
- Name: yc-shop
- Select Tomcat 7 as the application server (add it using configure button if not listed)
- Set VM options: -Xmx512m -Xms256m
Select on 'Update' action as "Update classes and Resources"
Warning You need to come back from "deployment tab" (next step) to set this option as it is only available once WAR files are added to deployment.
- Uncheck open browser after launch
- Ensure HTTP port number is 8080 and JMX is 1099
Click "Apply" and select deployment tab the following:
- Click "+", then "Artifact" and select "yes-shop-wicket:war exploded"
- Set application context to / (i.e. root) Note: 3.4.0+ now has default mapping of storefront to root (and not /yes-shop)
On the "Before launch" section at the bottom of the window:
- Click "+", "Run maven goal"
- Select working directory as "YC_HOME/yc-idea/web/store-wicket"
- Type "process-resources" into Command Line

Click "Apply", then "OK" to save configuration
Now you will be able to run storefront from IDEA by using the Run menu choice yc-shop or from the Application Servers window (View > Tool Windows > Application Servers).
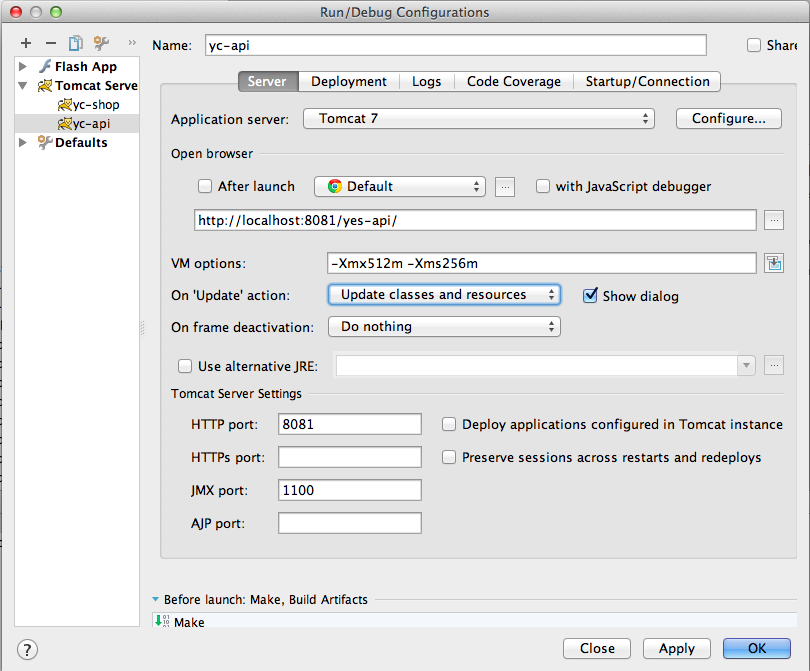
Webapp REST API
Open configurations window: Run > Edit Configurations
Click "+" in the top left corner and select "Tomcat Server > Local" from the menu
In the window specify:
- Name: yc-api
- Select Tomcat 7 as the application server (add it using configure button if not listed)
- Set VM options: -Xmx512m -Xms256m
Select on 'Update' action as "Update classes and Resources"
Warning You need to come back from "deployment tab" (next step) to set this option as it is only available once WAR files are added to deployment
- Uncheck open browser after launch
- Ensure HTTP port number is 8081 and JMX is 1100
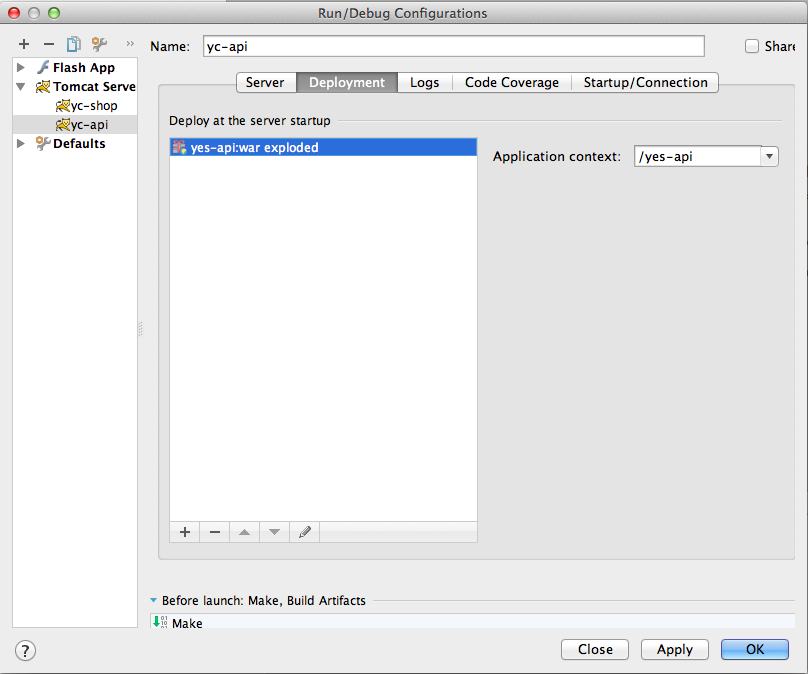
Click "Apply" and select deployment tab the following:
- Click "+", then "Artifact" and select "yes-api:war exploded"
- Set application context to /yes-api
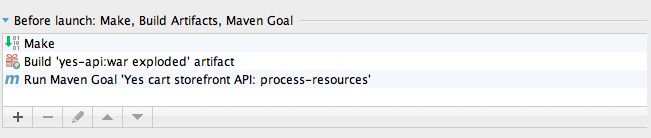
On the "Before launch" section at the bottom of the window:
- Click "+", "Run maven goal"
- Select working directory as "YC_HOME/yc-idea/web/api"
- Type "process-resources" into Command Line
Click "Apply", then "OK" to save configuration
Now you will be able to run REST API from IDEA by using the Run menu choice yc-api or from the Application Servers window (View > Tool Windows > Application Servers).
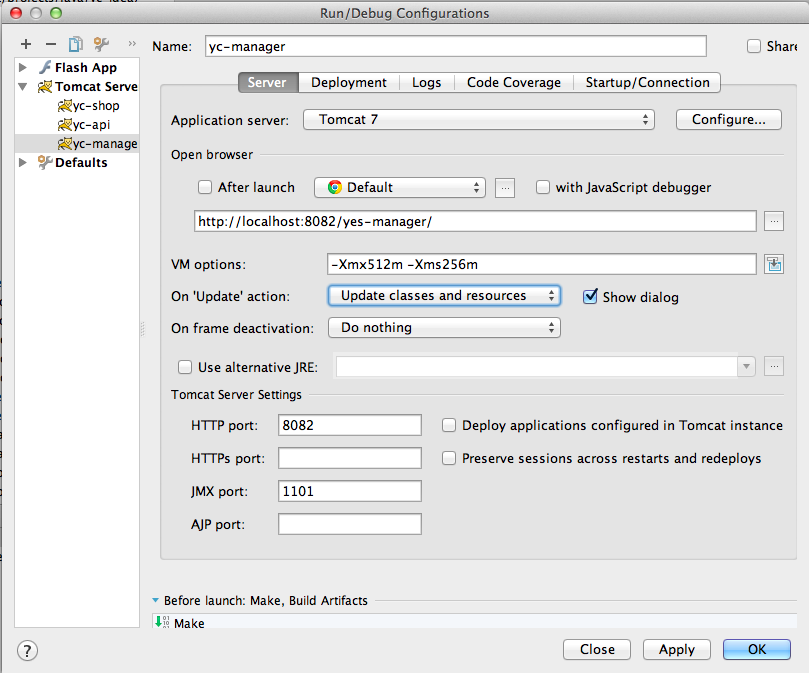
Webapp JAM server
Open configurations window: Run > Edit Configurations
Click "+" in the top left corner and select "Tomcat Server > Local" from the menu
In the window specify:
- Name: yc-manager
- Select Tomcat 7 as the application server (add it using configure button if not listed)
- Set VM options: -Xmx512m -Xms256m
Select on 'Update' action as "Update classes and Resources"
Warning You need to come back from "deployment tab" (next step) to set this option as it is only available once WAR files are added to deployment.
- Uncheck open browser after launch
- Ensure HTTP port number is 8082 and JMX is 1101
Click "Apply" and select deployment tab the following:
- Click "+", then "Artifact" and select "jam:war exploded"
- Set application context to /yes-manager
On the "Before launch" section at the bottom of the window:
- Click "+", "Run maven goal"
- Select working directory as "YC_HOME/yc-idea/yc-idea/manager/jam"
- Type "process-resources" into Command Line
Click "Apply", then "OK" to save configuration
Now you will be able to run JAM server from IDEA by using the Run menu choice yc-manager or from the Application Servers window (View > Tool Windows > Application Servers).
Running the project
When running YC the platform locally using above configuration you have the following components:
| Component | Dependency | Notes |
|---|---|---|
| Derby database | Derby server is started and stopped using yc.sh/yc.bat from command line. You must have derby server running before starting up any of the webapps | |
| Storefront | Derby | Client facing storefront that is launched from IDEA run option yc-shop |
| REST API | Derby | REST API that is launched from IDEA run option yc-api |
| JAM server | Derby, | Java Angular Manager (JAM) is administrative application server that is launched from IDEA run option yc-manager. Some operations in JAM are communicating update messages to Storefront and REST applications, so those need to be running for some operations to be performed (e.g. Indexing) |
Derby
Navigate to $YC_HOME in command line and start Derby database using command:
| Code Block |
|---|
$ ./yc.sh derbygob |
If you need to work with DB directly then connect using command:
| Code Block |
|---|
$ ./yc.sh derbycon |
When you finished working you can shutdown Derby using command:
| Code Block |
|---|
$ ./yc.sh derbyend |
Webapps
Running all web apps is straightforward from IDEA, simply launch the appropriate Run configuration.
| Tip |
|---|
| Remember that all web apps require Derby DB running. |
- Follow dependency table above to see in which order web apps need to be started
| Webapp | IDEA Run configuration | URL | Notes |
|---|---|---|---|
| Storefront | yc-shop | http://localhost:8080/ | You will need to set up connection to smtp server in order to see customer registration and order details update. Look for config-mail.properties in YC_HOME/env/maven/(yourenvironment) , default environment is dev |
| REST API | yc-api | http://localhost:8081/yes-api/ | Use REST client of your choice to work with API (some examples: Chrome REST plugin, CoocoaRestClient, SOAP UI). Data formats supported are: XML, JSON |
| JAM server | jam | http://localhost:8082/yes-manager/ | This URL should redirect to client in appropriate language. If the page is blank it could be that maven build was not done and client Flex app was not build. You can run it from IDEA as well. |
| Tip |
|---|
| If you encounter problems because missing resources, such as mail templates or swf, this could be because IDEA did a clean build and those files are not available. You need to copy those files either by running "mvn validate -Ptemplates" (see maven profiles section), or you could use "$ ./yc.sh cpres" command that will copy all necessary resources to all webapps |
JAM Client
JAM consists of two components: server (jam) and client (jam-jsclient).
The server must be running when developing the client. In order to track your modifications npm start command must be run from the manager/jam-jsclient/src/main/typescript directory. This will only track the modifications you make and compile the typescript into javascript. In order to update the files on the running server you must run mvn validate -Pdev,nodejs,derby,ftEmbededLucene from manager/jam which will update the resources on your currently running server.
Default user/password to connect is:
| username | admin@yes-cart.com |
| password | 1234567 |
Final configurations
Configuring shared image vault
By default the image vault is configured in the environment specific configuration file yc-config.properties to point to theme/imagevault/src/main/resources/default/which contains the default layout for this directory. We highly recommend copying this outside of the project directory structure and changing the paths in yc-config.properties
IDE recommended settings
We recommend to enable the following settings:
Tool Windows bars
From preferences: Appearance & Behaviour > Appearance
Click "Show tool window bars"
This will create buttons on edges of the IDE window to allow you quickly navigate between Tools Windows.
Import demo data
Follow steps on Demo Data Import
Tips and Tricks
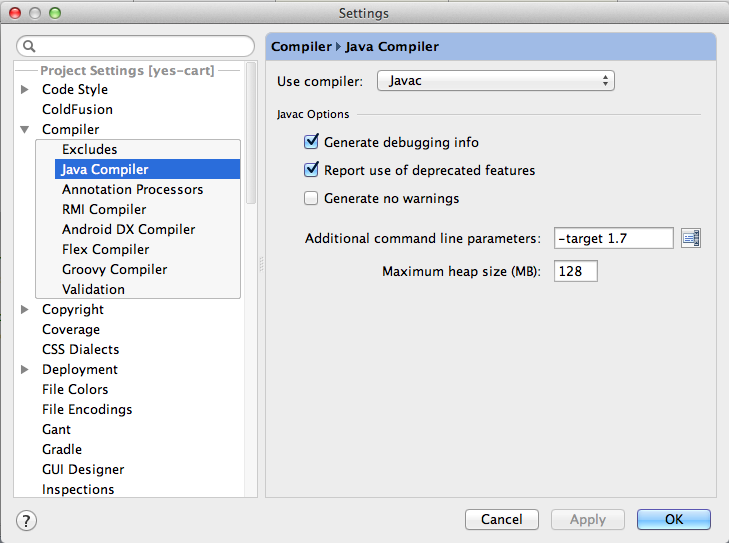
javac source release 1.X requires target release 1.X
When Intellij IDEA imports maven projects it sets command line flag for the compiler to be compatible with source and target versions set in pom.xml files.Symptoms is the following message during compilation:
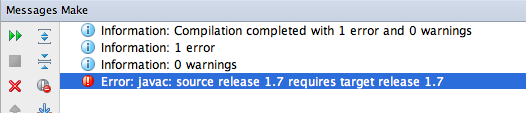
To fix this open Preferences > Compiler > Java Compiler and change the "Additional command line parameters" as necessary.
where are all the log files
Intellij IDEA generates a temporary directory for Tomcat which mimics its structure to load web applications via run/debug/application server windows.
The logs are kept there along with temporary files.
On MacOSx the directory is in:
| Code Block |
|---|
/Users/[yourusername]/Library/Caches/IntelliJIdea11/tomcat/[webappname]/logs |
where [yourusername] is your login and [webappname] is auto generated name for your run configuration.
On Windows the directory is in:
| Code Block |
|---|
C:\Users\User.IntelliJIdea14\system\tomcat\[webappname]\logs |
java.lang.IllegalArgumentException Could not resolve placeholder
Sometimes when you switch between branch and master in Git Intellij IDEA files may go out of synchronisation.
Simple fix is to:
1. Find project in Maven window in Intellij IDEA
2. Click skipTests button
3. Run install goal for the web apps module
If above does not work it is recommended to do a clean install from command line.
| Tip |
|---|
| Ensure that you are using local installation of Maven3 in Preferences > Build, Execution, Deployment > Build Tools > Maven |
| Warning |
|---|
| it is not recommended to use bundled one. |
Perform a clean maven build from command line:
| Code Block |
|---|
mvn clean install -PdevIntellijIDEA,derby,ftEmbededLucene,paymentAll -DskipTests=true |
Then synchronise files in Intellij IDEA: File > Synchronise
Error creating bean with name 'dataSource' defined in class path resource
Sometimes when you switch between branch and master in Git Intellij IDEA files may go out of synchronisation.
Simple fix is to:
1. Find project in Maven window in Intellij IDEA
2. Click skipTests button
3. Run install goal for the web apps module
If above does not work it is recommended to do a clean install from command line.
| Tip |
|---|
| Ensure that you are using local installation of Maven3 in Preferences > Build, Execution, Deployment > Build Tools > Maven |
| Warning |
|---|
| it is not recommended to use bundled one. |
Perform a clean maven build from command line:
| Code Block |
|---|
mvn clean install -PdevIntellijIDEA,derby,ftEmbededLucene,paymentAll -DskipTests=true |
Then synchronise files in Intellij IDEA: File > Synchronise
Unable to import maven project: See logs for details
Sometimes when you switch between branch and master in Git idea files may become corrupted, especially when modules structure is different.
This causes IDEA to fail to load maven modules properly and display the following message when trying to re-import:
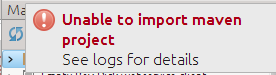
If you got into this condition and did not notice then during deploying of web application you will encounter the various errors during deployment of webapps.
If you are asked to remove some modules - do so and then re-import all modules in the Maven window.
If this does not help unfortunately the only way to solve this is to delete corrupted .idea, *.iml, *.ipr and *.iws files and reimport
- Close Intellij IDEA
- Navigate to .idea directory and delete it
- Re-open Intellij IDEA
- Reconfigure workspace